 | ||
| ||
 |  | |
 |  |
|
LED Third Brake Light This page and gadget was created in early 2000. Technology has marched on since I made this and it could be a lot better now with newer LEDs. Also, pre-made kits are available. Have you seen some of the new Cadillacs that are running LED brake lights? Or maybe you've seen them on newer big rigs? If you have you've surely noticed how good they look. They come on faster than regular lamps (like an explosion really) and burn brighter too. Over all they simply have more "urgency" when they come on. And urgency is exactly the sort of thing I want my brake lights to convey! 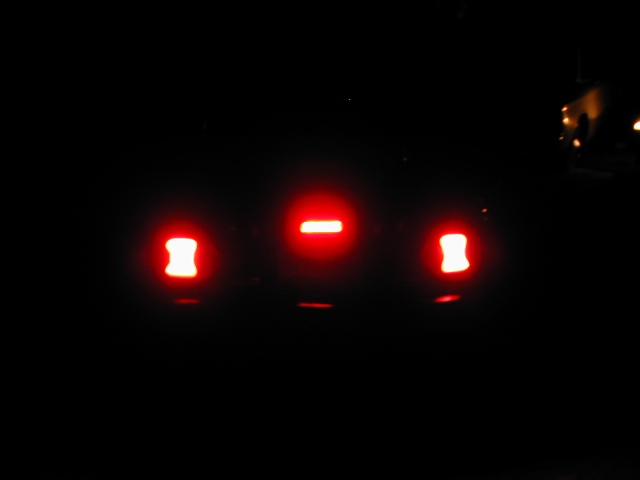 Parts list:
Soldering iron Solder Some tool to cut the circuit board to shape (I used a Dremel w/ cut off wheel) Epoxy or some other strong and heat resistant glue Some assorted wire Circuit diagram: 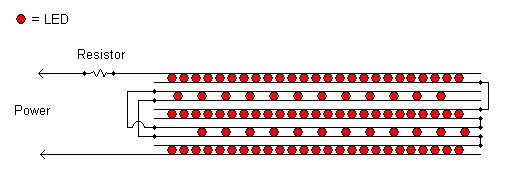 You could be creative with the diagram if youd like or the bus spacing on your board is different. With the hole spacing on mine I found that I had to grind off the little flange at the bottom of each LED so that they would sit flush against each other properly. If you find a different LED or different board this might not be neccesary. Important! LEDs are different from regular light bulbs in two important ways! 1) They MUST have a resistor in the circuit in order to keep from burning out. The resistor size is determined by how they are connected and how many. 2) They will only light when power is applied in the correct direction. What that means is that you have to solder ALL the LEDs in the same orientation. One lead is positive and the other negative. Nothing bad will happen if you connect them backwards (and you have the resistor in place), they just won't light. Other construction notes. Check the specs if you buy different LEDs. What's called "Millicandela Rating" or simply "mcd" is how bright they are. These are 2800 mcd. They make them brighter, but super extreme bright ones usually have a very narrow angly of view (imagine you step to one side and can't see the light any more). "Operating Current" is how much current they want to have to run. DON'T EXCEED THE RATED CURRENT! I epoxied the array to the inside of the lens from the car. I used only 5 drops at strategic places. It needs to stay in place, but you also need to be able to break it free if some LEDs need replacing at a later date. 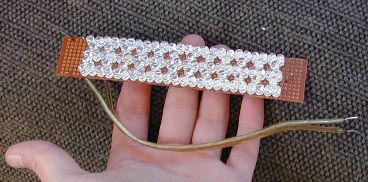  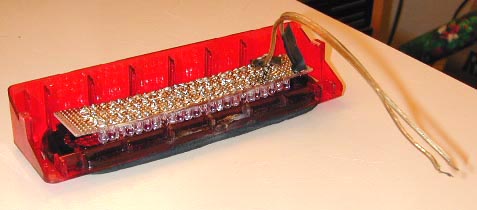  What the pictures don't show is that the light coming fromt he LEDs is noticably more "red" than the others. Brightness is slightly brighter than stock. Copyleft Mark Leinhos Last modified 08/04/15 | ||||
 GET STARTED WITH STYLE - GREAT IDEAS TO HELP YOU UPDATE YOUR DECOR GET STARTED WITH STYLE - GREAT IDEAS TO HELP YOU UPDATE YOUR DECOR |
 |
 CREDIT EVENT - NO CREDIT FOR 120 DAYS!!! CREDIT EVENT - NO CREDIT FOR 120 DAYS!!!
|
|
 MARK LOVES YOU. JUST NOT THIS MUCH. MARK LOVES YOU. JUST NOT THIS MUCH. |
smir nir dir boor nir dir mmm
bork bork bork!